Treatment Room Photography: Making Clinical Spaces Look Inviting
Key Takeaways
- Treatment room photos are the first thing anxious patients look at when evaluating a clinic
- Warm, diffused lighting transforms clinical spaces from sterile to welcoming
- Styling with premium details (towels, candles, products) communicates luxury without looking staged
- Balance clinical equipment visibility with comfort elements for credibility + warmth
- Wide-angle lenses and corner compositions make small rooms feel spacious
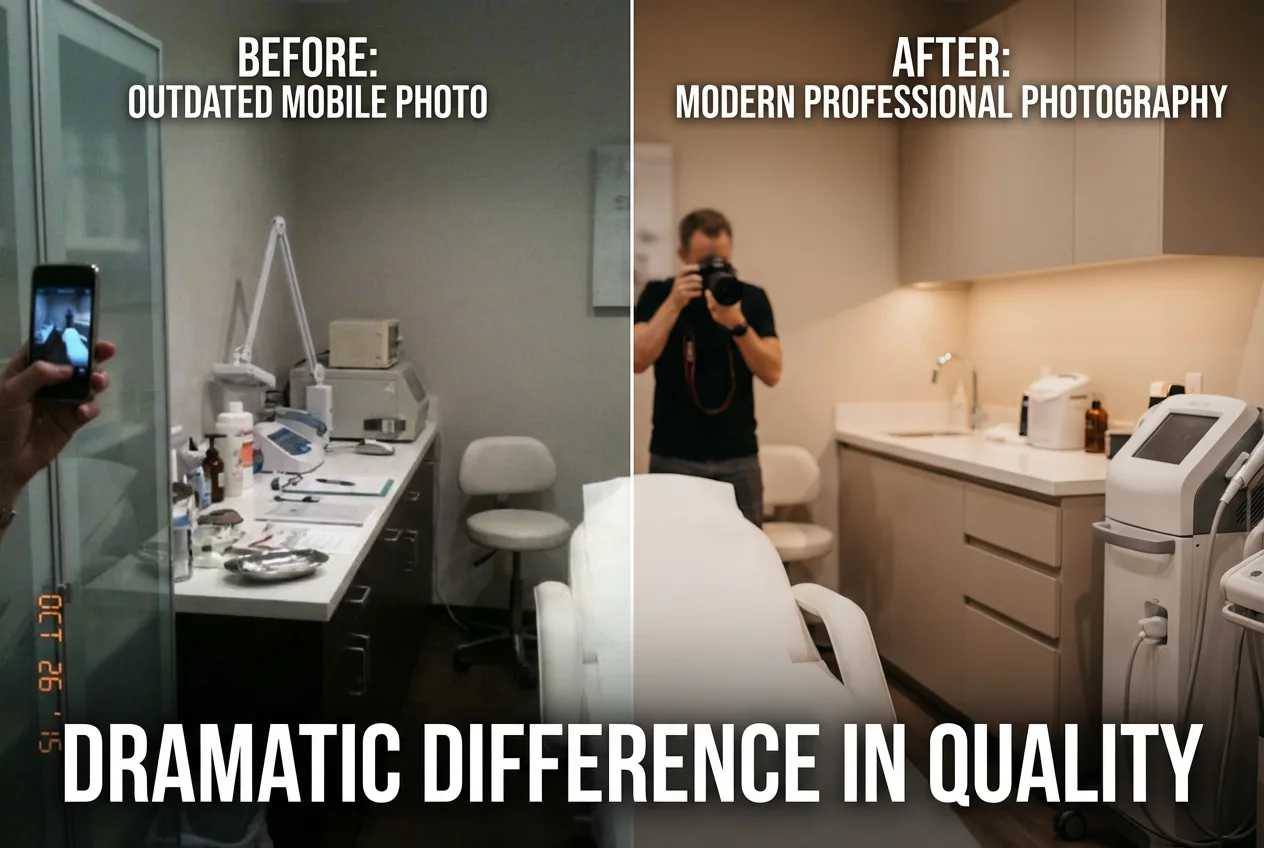
A treatment room is where the magic happens — but it is also where patient anxiety peaks. For prospective patients browsing your website, treatment room photography answers the question: "Will I feel comfortable here?" If your photos show a cold, fluorescent-lit clinical space, the answer is "probably not." If they show a warm, clean, thoughtfully designed environment, you have reduced anxiety and moved that patient significantly closer to booking.
See how In Focus by Zain photographs clinic interiors
View interior photography workThe Three Pillars of Treatment Room Photography
1. Lighting
Lighting makes or breaks treatment room photography. Replace harsh overhead fluorescent illumination with warm, diffused lighting for the shoot. Professional photographers use portable softbox lights to create the warm, inviting atmosphere that makes clinical spaces feel welcoming. Where possible, incorporate natural light from windows — it adds depth and warmth that artificial lighting alone cannot replicate. If your treatment rooms have adjustable LED panels, set them to a warm colour temperature (3500-4000K) for photographs.
2. Styling
Styling is the art of adding comfort and luxury signals without looking staged. Fresh, neatly folded towels. A small arrangement of premium skincare products. A subtle candle (never lit during treatments, but visually effective). A plant or floral arrangement. These details communicate care, attention, and quality. Remove clinical waste bins, sharps containers, and administrative clutter from the frame — these belong in the room but not in the photograph.
3. Composition
Photograph treatment rooms from doorways or corners to maximise the perception of space. Use wide-angle lenses (16-24mm equivalent) but avoid extreme fish-eye distortion. Include the treatment chair or bed as the focal point, framed by comfort elements and technology. Shoot at a slightly elevated angle to show the full room layout. Leading lines (edges of counters, lines of ceiling panels) draw the eye through the space and create visual interest.
Want your treatment rooms to look their best?
In Focus by Zain styles and photographs clinic interiors that patients want to visit.
Get a Free QuoteBefore the Shoot: Preparation Checklist
- Deep clean all surfaces, equipment, and floors
- Replace or launder all soft furnishings, towels, and bed covers
- Remove personal items, administrative documents, and visible clutter
- Arrange products neatly and remove expired or damaged packaging
- Check all light fixtures are working and clean
- Consider a fresh coat of paint if walls show wear
- Position chairs and beds in their most photogenic configuration
Frequently Asked Questions
Transform Your Treatment Room Imagery
In Focus by Zain — clinic interior photography. London, Manchester, Birmingham.
Book Free Consultation